
Malua
An Adams cruising yacht
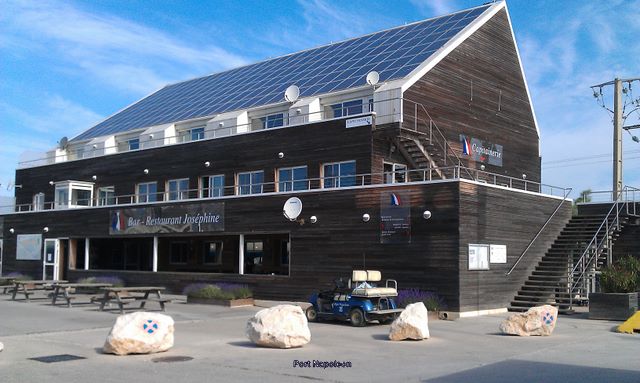
Malua started her cruise from where we hauled her for the
winter, in Port Napoleon in France.
The marina is large with plenty of space to leave your vessel. I
chose a place without electricity or water which as we are not on the
boat is no loss but to prepare Malua for the season I needed the
necessities of life so I had the boat moved at a cost of E63.
I
arrived to find Malua in amongst other boats some getting ready to go
in the water while other were not to move for some time to come.
I had created a long To Do list to finish off some jobs not
tackled in previous preparations. The major job was the small
hole I found in the keel behind the integrated lead keel. At the
end of last season I had opened up the hole to let the moisture
evaporate and to establish exactly how large this void was. On my
return I was armed with resin, cloth and matt ready to fill the hole.
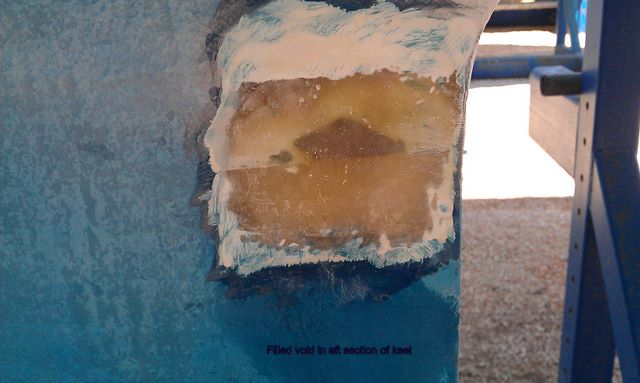 After grinding away some glass I poured in less than 300ml of
resin and filled the void with chopped up mat. The last section I
had thickened the resin to push it up into the hole. The exercise
went off in just two sittings and I had filled and finished the void.
How a builder can leave a cavity in a keel after placing the lead
into the keel area I just don't know. Maybe it is a design
feature!
After grinding away some glass I poured in less than 300ml of
resin and filled the void with chopped up mat. The last section I
had thickened the resin to push it up into the hole. The exercise
went off in just two sittings and I had filled and finished the void.
How a builder can leave a cavity in a keel after placing the lead
into the keel area I just don't know. Maybe it is a design
feature!
The next job was to remove the excess antifouling from the skeg - I should have done the rudder as well but seeing one is not allowed to do antifouling work in the current location I stuck to just the skeg which in itself was quite a challenge. You have to scape the antifouling off with a scrapper, piece by piece. I completed the task over three afternoons, taking a shower after each session. Unfortunately the antifouling got under my skin and the back of my hand started to swell.
Three days later all the antifouling
was off and I was down to the epoxy paint I had applied in
Canberra.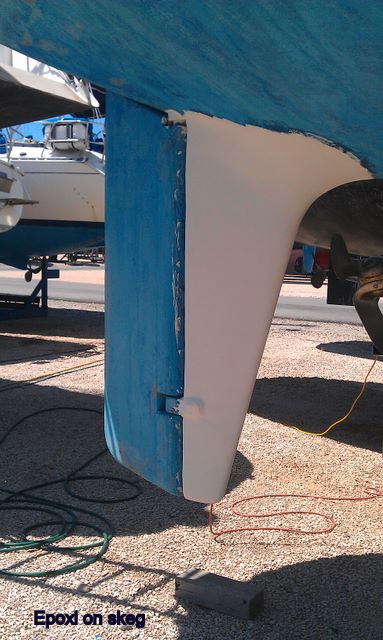 To make a good job of the opportunity I applied four
coats of epoxy over the original, applied some undercoat and the rudder
stock was ready to take the antifouling again. The same blue not
required in the fresh water of the canals but this section of the
boat won't need attention for another ten years.
To make a good job of the opportunity I applied four
coats of epoxy over the original, applied some undercoat and the rudder
stock was ready to take the antifouling again. The same blue not
required in the fresh water of the canals but this section of the
boat won't need attention for another ten years.
Now to polish the top sides. In Turkey I had polished them with wax so they were looking OK but the salt water had formed a white residue on the blue of the boot top. In general I dont purchase marine products because they are just household cleaner in a fancy tine with a high fancy price but on this occasion I did buy a paint - white spot remover. Did it work? just great so I painted it on and watched as the white disappeared and the royal blue of the boot top appeared. Was that an indication of the value of these products - not on your life. The next bottle of highly priced concoction did nothing as the top sides looked just the same as before. I got out the special French compound I had purchased in Oz and set about polishing and buffing the white top sides with the now fixed electric polisher. I was assisted by the use of a movable scaffold from the yard which made the job easier not having to climb down move the tressels and the planks then climb up again and continue the polishing. I had the job done before the bar opened for a well earned beer that evening.
Next was the replacing the cutlass bearing in the
propeller shaft just ahead of the propeller. 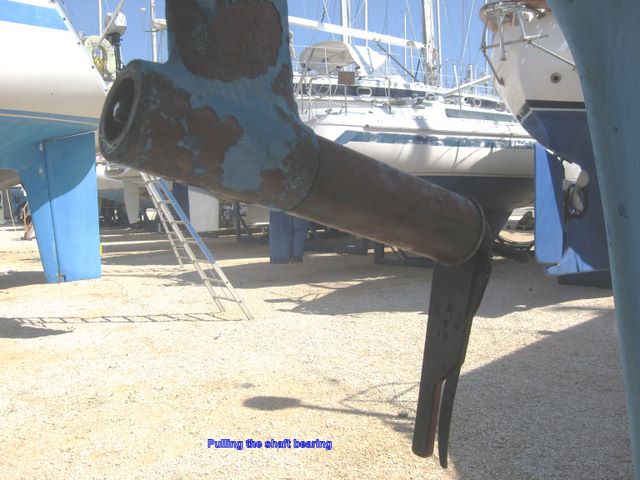 If it is worn the
shaft rattles as it turn. Not much but enough to make a noise.
Given we are going to motor all the way to Paris I did want to
reduce the noise. This is not an easy job because generally one
has to remove the rudder as well because it is in the way as one pulls
the shaft out of the hull but on on Malua where the shaft is offset to
starboard and the shaft just passes to one side of the rudder skeg.
With the right tools the job can be completed quite easily but
there is always a snag with a boat.
If it is worn the
shaft rattles as it turn. Not much but enough to make a noise.
Given we are going to motor all the way to Paris I did want to
reduce the noise. This is not an easy job because generally one
has to remove the rudder as well because it is in the way as one pulls
the shaft out of the hull but on on Malua where the shaft is offset to
starboard and the shaft just passes to one side of the rudder skeg.
With the right tools the job can be completed quite easily but
there is always a snag with a boat.
After the cruise in the
Pacific a good friend at the Bay made for me a set of pullers, pusher
and the correct size collars to take on this task. I used then at
River Quays in ‘06 to replace the bearing. I took off the
propeller using the correct puller. All nuts and bolt had
previously been well greased with lanolin so they came loose easily.
 Within minutes the shaft was disconnected from the Yanmar motor
via the flexible coupling, the dripless gland was slid off the end of
the shaft and the shaft was slipped out of the boat past the rudder
skeg. The shaft being 1 1/2 inch was nice and straight with no
ware or pitting. All done before lunch without the use of a hammer.
Within minutes the shaft was disconnected from the Yanmar motor
via the flexible coupling, the dripless gland was slid off the end of
the shaft and the shaft was slipped out of the boat past the rudder
skeg. The shaft being 1 1/2 inch was nice and straight with no
ware or pitting. All done before lunch without the use of a hammer.
Next came the puller for the actual cutlass bearing. Now this is a challenge. On went the parts and I started to turn the nut at the end of the long threaded bar which forced the bearing out of its housing. As smooth as a skate over ice, it came out of the housing, next the opposite direction with the new bearing. Again it went in without trouble. Apply some lanolin and the shaft slid into the new bearing and back into the hull and onto the end of the motor. I inserted the dripless gland with it o rings onto the shaft, slid the coupling flange on to the end of the shaft and did up the 34mm nut at the end with its locking screw. Then the eight nuts and bolts of the flexible coupling and the shaft was back, better than new.
On went the propeller with its new anode fitting to
replace the Autoprop's expensive anode which only last half a season
and the job was done. A day latter I cleaned the prop and covered
it with the lanolin grease I use as antifouling. 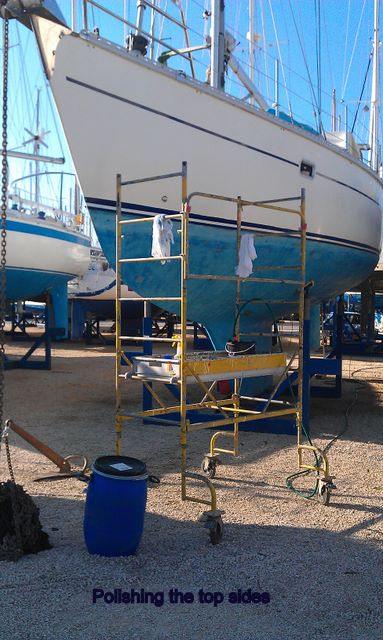 I also had about
1 litre of antifouling left from last season so I rolled a strip below
the boot top where Malua would rise out of the water when I removed the
mast and other heavy items. I also remeasured the draft and made marks
on the hull to see exactly where 1.8m draft would be. I doubt
that I could take that much weight off Malua to make those marks.
I also had about
1 litre of antifouling left from last season so I rolled a strip below
the boot top where Malua would rise out of the water when I removed the
mast and other heavy items. I also remeasured the draft and made marks
on the hull to see exactly where 1.8m draft would be. I doubt
that I could take that much weight off Malua to make those marks.
The next was to paint the floor of the cabin. Not an easy job because one inevitably paints oneself into a corner not able to exit from your entry point. I have not used gloss on the interior but rather a matt finish over a number of coats of gloss. It gives the finish a deep glow rather than a flashy finish of a production boat. The floor has a similar finish but I could not get the same varnish. The first coat went well but the second just did not look right so I had to go over the whole floor again to get a good finish. Two days later I realishe I had not given the hatches in the floor the third coat so out they came for their final coat. They look much better.
Next was the launch and the removal of the
mast. I prepared the turn buckles the previous day, undoing them,
measuring the distances so I could tighten the rig to the same
condition as previously.  On the appointed time the travel lift
appeared and we off to the waters edge. No need for the final
paint of antifouling where the stand where on the hull because we are
in fresh water and no growth. Start the engine, no leaks, water
flowing through the exhaust system and Malua is ready to go. We
came alongside and the crane attached itself to the mast and i started
to undo all the stays. 12 in total to hold the mast up. All tied
without loosing a single pin overboard. The mast came out of its
spot on the deck to reveal I though the gold Kruger Rand I had placed
at its foot but alas It was glassed in under the mast step. I may
have to wait another day if I am to collect that investment purchase at
well under $300 and oz and now valued well over $1200.
On the appointed time the travel lift
appeared and we off to the waters edge. No need for the final
paint of antifouling where the stand where on the hull because we are
in fresh water and no growth. Start the engine, no leaks, water
flowing through the exhaust system and Malua is ready to go. We
came alongside and the crane attached itself to the mast and i started
to undo all the stays. 12 in total to hold the mast up. All tied
without loosing a single pin overboard. The mast came out of its
spot on the deck to reveal I though the gold Kruger Rand I had placed
at its foot but alas It was glassed in under the mast step. I may
have to wait another day if I am to collect that investment purchase at
well under $300 and oz and now valued well over $1200.
I had
contacted the mast transporter to find out how to wrap the mast for its
journey to le havre, collected the bubble wrap, carpet and various
types of tapes specifically for the job. 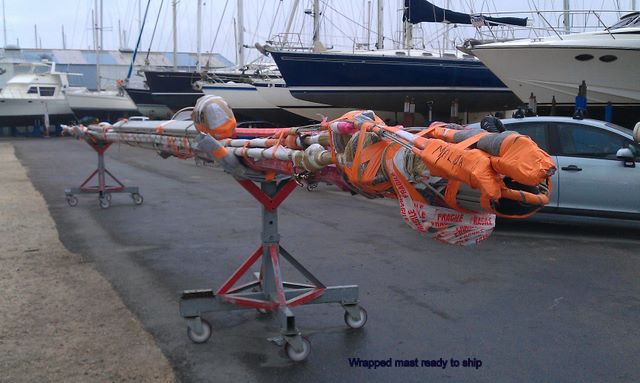 It took more than ten
hour to complete the wrap but in the end I was very happy with the job.
I just hope it is worth it and I dont have to undo the work if we
cant get through the canals and have to restep the mast in Port
Napoleon.
It took more than ten
hour to complete the wrap but in the end I was very happy with the job.
I just hope it is worth it and I dont have to undo the work if we
cant get through the canals and have to restep the mast in Port
Napoleon.
Now to remove the heavy items from the boat - five anchors, 100m of 10mm chain, life raft, outboard engine and the five sails. What a job to stack all this on the quay and remeasure the draft. In the end the bow rose up 50mm, the stern 20 and the main areas amidships only rose 10mm less than an inch. I am never going to reduce the draft from 2006 to 1800. impossible so I just put all the things back in the boat - mainly in the bow and low and behold it stayed the same. So now the draft is just 2.0m. OK for the Rhone. Soame and some of the other canals which have a reported clearance of 2.2 but there is a section with an unknown depth which we may not get through. lets hope it rains and the rivers and canals are full for our passage.
Some photos are here.
Follow our trip north up the Rhone here at the Rhone River